|
Author: Skip
Koni sealed strut insert conversion (8641-1414S)
|
Description |
Image |
| Parts: Koni 8641-1414S Sport Struts - all conversion and instructions parts included.
Tools: Aside from the tools needed to safely remove the strut from the car - hacksaw (or suitable alternative), 3mm (1/8") drill bit, 14mm (9/16") drill bit, metal file. Optional - once the inserts go inside the casing, that distinctive yellow is gone forever. Plasti-Kote T-29 (School Bus Yellow) or Duplicolor DA1663 (School Bus Yellow) are about the closest match you'll find. |
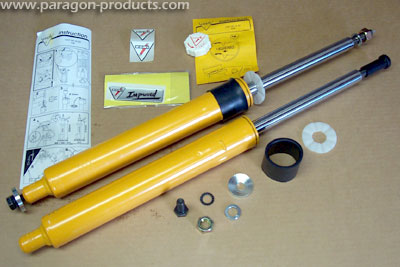 |
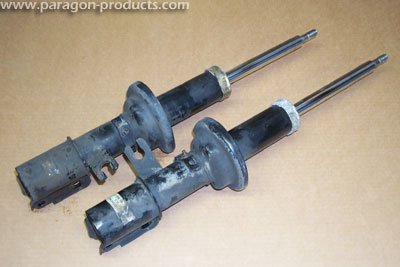
| Discussion: From the 1987 model year, including the 1986 Turbo, Porsche used a sealed strut application for the front of the entire 944 series - to include the 968 starting in 1992. The new Koni 8641-1414S insert replaces the now discontinued 8741-1136S sealed strut. This move adds a bit of work to the strut installation process, but represents a savings to the consumer of over $100 per strut! This Tech-Session will cover the conversion of a stock sealed strut casing into a rebuildable Koni Sport Strut.
The Basics: Preparation of the strut is simply to remove it from the car, and safely remove the spring and upper perch from the strut. You will be drilling a relief hole to allow the shock oil to drain, then mark and cut the top of the strut, then drill the final mounting hole used to secure the new strut. Once completed, you will insert the strut into the casing and torque the lower nut to specification. |
 |
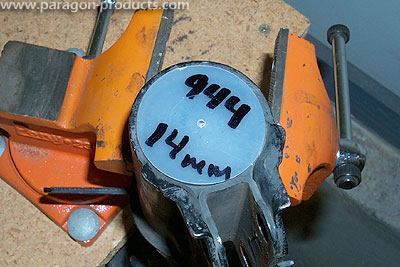
| Find center: Mark the absolute center of the bottom of the strut casing. Use a center punch or nail to divot and make ready the center for drilling. This measurement should be you best effort, but does not need to be perfect. |
 |
|
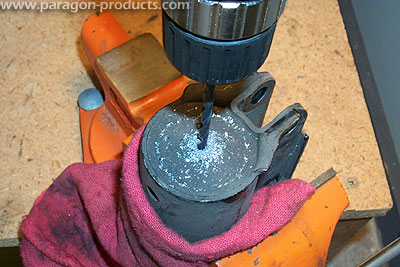
Drill relief hole: Using a 3mm (or 1/8") drill bit, drill a hole in the center of the strut bottom. Some compressed air may escape as the hole runs through - not enough to cause alarm. Drain and dispose of the shock oil.
CAUTION: In some cases, the pressure inside the strut may be enough to blow out an excess of oil. When drilling the relief hole, be prepared for this by wearing protective goggles or a complete facemask. Or, if you prefer your skin to be thoroughly moisturized, take your chances.
One customer had this to say: "Oil erupted in cataclysmic fashion from the shock, completely covering me and laying a gigantic blast radius of oil on my garage floor about 3' in diameter." |
 |
| Mark for cutting: For the 944 conversion from Boge/Sachs struts you're shooting for 315mm (~12 2/5"). Ensure the circumference is marked properly to aid in cutting a smooth, straight line. I made a jig out of ABS plastic, but any ruler and a couple straight edges will do.
"Measure twice, cut once!" Make a mistake here and you'll be walking the junkyards looking for another set. The importance of this measurement is that it provides just enough clearance for the mounting bolt to start pulling the insert into the casing while still retaining as much of the casing as possible. A tolerance of ~1mm on either side is perfectly acceptable. |
.jpg) |
| Make the cut: Using a hacksaw or cutoff wheel, cut the casing all the way around. Using a bench vise to hold it - then rotating 1/4 turns seems easiest.
Remove and dispose of the strut internals and any remaining fluid. |
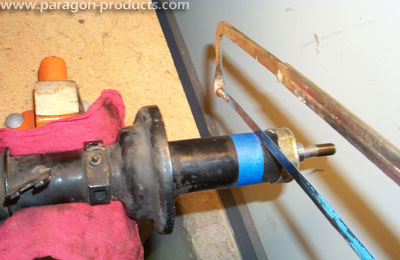 |
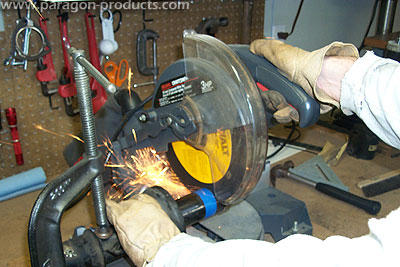
| Make the cut FASTER: 10" metal cutting blade on a compound miter saw - "Like a hot knife through warm butter". Saws right through the inner casing and shaft. |
 |
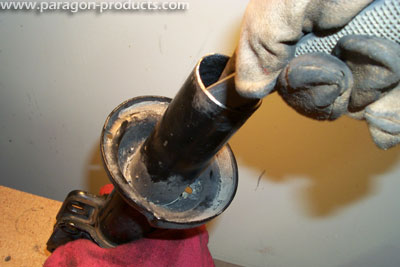
| Clean the cut: Optional, but you should clean the edges of your cuts with a metal file or suitable alternative. |
 |
|
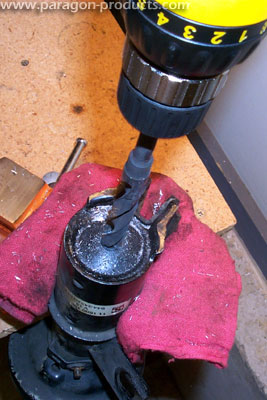
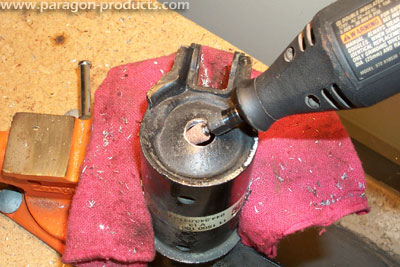
Drill the bottom: Using a 14mm (or 9/16") drill bit, use the previous relief hole to center cut the bottom mounting hole. Again, the hole can be slightly larger than 14mm as there will be a large washer used when complete.
NOTE: The 14mm hole is larger than it needs to be using the new lower bolt kit (rounded Allen head). However, I've found this allows for some additional clearance making the lower bolt easier to start. A 1/2" drill bit can be used, but the center must be marked very precisely. |
 |
| Clean the cut: Optional, but you should clean the edges of your holes with a metal file or suitable alternative. |
 |
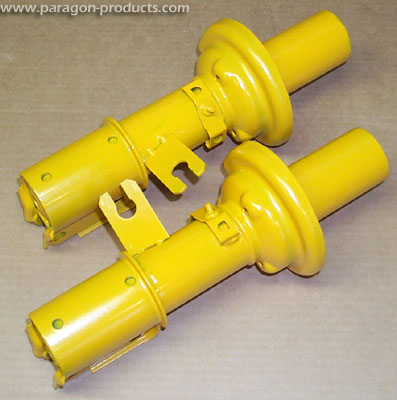
| Painting: If you want to retain that distinctive mark of suspension excellence, or, just give the struts a new coat of black - now's the time. Clean them well - maybe even lightly sand to give a good surface - then spray away. For Koni Yellow, we recommend Plasti-Kote T-29 (School Bus Yellow) or Duplicolor DA1663 (School Bus Yellow). |
 |
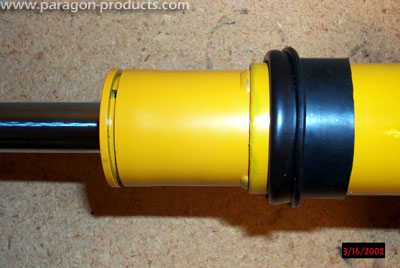
| Rubber sleeve: Place the included rubber finishing sleeve over the strut casing. Fold over the top lip as shown. Alternatively, you can wait to slide the rubber sleeve over the finished unit once the strut insert is installed - I prefer this method.
Insert strut: The new Koni strut has locating tabs that will stop the insert from seating all the way in the case. The locating tabs keep the insert secure inside the casing. |
 |
|
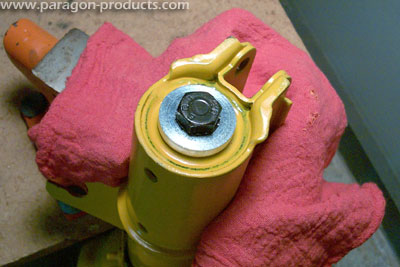
Thread screw: If you measured and cut correctly from above, the supplied bolt and washer arrangement should fit through the bottom of the case and lightly thread into the insert. Tightening the bolt will pull the strut into the casing.
NOTE: It may be necessary to slam the strut into the tube slightly to allow the lower bolt to thread in - or, to use the bolt alone to thread the strut and pull it down in. Also, your lower bolt and washer may look different from that pictured here. Finally, it helps to grease the lock washer slightly to prevent it from binding while tightening. |
 |
|
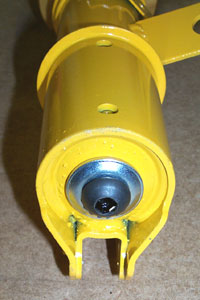
Torque: Tighten the M14 bolts down to 63 ftlbs.
NOTE: Most kits shipped after March 2003 have a new lower bolt and washer (rounded Allen head). Torque for the new Allen bolt is 55 ftlbs. |
 |
| Finishing touches: You can now flip the rubber finishing lip up onto the insert. The large white plastic bushing goes on-top of the rubber lip - protecting the strut bump stop from creating a harmful suction to the strut.
Not that hard, was it ;-) |
 |
Are you adding our adjustable ride-height kit? If so, follow the instructions here. We recommend you remove the lower perches to allow full adjustability of the ride-height kit - as shown below:
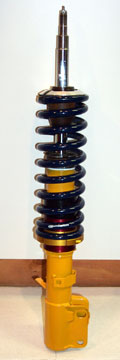
 Please, use great caution when removing compressed springs from the car. Please, use great caution when removing compressed springs from the car.
Credits: Skip Grehan
| Related Articles |
> Window Express Kit Installation
> AC Delete
> Accusump Installation
> Adjustable Ride Height Kit - Paragon
> Alternator Replacement
> Brakes, front - 924S, 944, 944S
> Brey-Krause Strut Brace Installation - 944
> Camber Plate Installation (Paragon)
> Clock/Bulb Replacement, digital, Late 944 and 968
> Clutch Replacement - Part One
> Clutch Replacement - Part Two
> Clutch Slave Bleeder Valve Remote
> Control Arm Bushing Upgrade - Weltmeister
> Control Arm, Front - Info
> Coolant Flush
> DME Chip Installation
> Dash Replacement
> Engine Identification
> Engine Production
> Fuel Level Sender
> KLA Strut Brace Installation - 924S, 944, 968
> Motor Mount Replacement
> Odometer Gear Replacement - late 944
> Oil Cooling, Auxiliary
> Oil Pressure Relief Valve
> Oil Pressure Sending Unit Replacement
> Rear Ride Height Adjustment
> Porsche Chronology
> Rear Spring Rates vs. Effective Rates
> Rear Wheel Bearing Diagnosis
> Rear Wheel Bearing Replacement - 924, early 944
> Rear Wheel Bearing Replacement - late 944, 968
> Ride Height Measurement
> Rod Bearing Replacement
> Shift Lever Rebuild
> Short Shift Kit
> Throttle Position Sensor
> Sway Bars - Info
> Torque Tube Rebuild
> Torsion Bar Replacement
> Transaxle Fluid - Info
> Transaxle Fluid Change
> Rear Sway Bar Installation
> Transaxle Replacement
> Heater Clip
> Window Regulator Replacement
> Seat Back Brace Installation Instructions
> KLA Strut Brace Installation - 968/944 S2/944 S
|
|


.jpg)


